Microcontroller
We decided on the Arduino Mega 2560 microcontroller to control our device. It was primarily chosen because it was the only Arduino microcontroller with enough digital I/O pins to allow interface with a GLCD (14 pins to microcontroller) and the 4x4 Keypad (8 pins). We considered the large 9cm x 7cm GLCD an essential component of our device because it greatly increased the user compatibility.
The Arduino Mega also provided us with 3 PWM output pins for the servo motor control, an analog input for the sensor circuit and serial data TX and RX pins for wireless transmission. The Arduino family of microcontrollers was initially chosen because all of our group members were familiar with their programming language of C++. It was also chosen because of its simplicity and its diverse online database of libraries which provided us with an important starting point for our software.
The Arduino Mega also provided us with 3 PWM output pins for the servo motor control, an analog input for the sensor circuit and serial data TX and RX pins for wireless transmission. The Arduino family of microcontrollers was initially chosen because all of our group members were familiar with their programming language of C++. It was also chosen because of its simplicity and its diverse online database of libraries which provided us with an important starting point for our software.
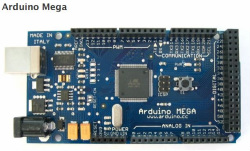

The Arduino Mega wired up in our final project
Code
The device was programmed in C++ on the Arduino software. It followed the traditional Arduino programming format of a setup() function followed by a continuously running loop() function.
Three existing Arduino libraries were used to simplify our programming:
The main duties assigned to the setup() and loop() function:
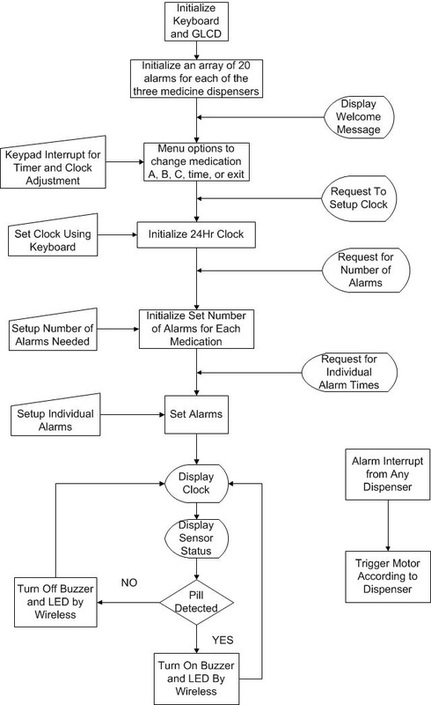
The setup() function:
1. Initialize GLCD (set fonts)
2. Initialize Servos
3. Initialize output pin for buzzer and the wireless module
4. Prompt user for time
5. Allow user to enter number of alarms of each medication
6. Allow user to set a time for each alarm
The loop() function:
1. Display Time
2. Allow user to change the time or the alarms for a chosen medication 3. Process Analog input from sensor circuit to detect pill
4. Dispense Medication at the required time
5. Output buzzer and wireless if pill is detected
Three existing Arduino libraries were used to simplify our programming:
- Keypad Library (http://www.arduino.cc/playground/Main/KeypadTutorial)
- KS0108 GLCD Library (http://www.arduino.cc/playground/Code/GLCDks0108)
- Servo Library (http://www.arduino.cc/en/Reference/Servo )
The main duties assigned to the setup() and loop() function:
The setup() function:
1. Initialize GLCD (set fonts)
2. Initialize Servos
3. Initialize output pin for buzzer and the wireless module
4. Prompt user for time
5. Allow user to enter number of alarms of each medication
6. Allow user to set a time for each alarm
The loop() function:
1. Display Time
2. Allow user to change the time or the alarms for a chosen medication 3. Process Analog input from sensor circuit to detect pill
4. Dispense Medication at the required time
5. Output buzzer and wireless if pill is detected
Software Flowchart